When that first ache starts creeping up your shin, your instinct might be to slam on the brakes and stop all activity. But as physical therapists, we know that the most effective shin splints physical therapy treatment doesn't start with complete rest. It starts with smart activity modification. The key is learning to listen to your body’s signals and adjust, which lets you start healing right away without being completely sidelined.
Taking Control of Shin Splint Pain Right Away
The moment you feel that familiar, throbbing pain along your shinbone, your body is sending you a clear message: something needs to change. That ache is clinically known as medial tibial stress syndrome (MTSS), and it’s one of the most common overuse injuries we see, especially in runners and athletes. It’s what happens when repetitive stress starts to overwhelm the muscles, tendons, and bone tissue in your lower leg.
Your first response shouldn't be to panic, but to get proactive. It’s all about reducing the load on your shins. We call this concept relative rest, and it’s a cornerstone of modern physical therapy. It means you don’t have to grind to a halt; you just need to move differently. This mindset is central to how we work at Highbar Physical Therapy—we focus on getting you better so you can get back to living a fuller, better life.
The "Soreness Rules" for Staying Active Safely
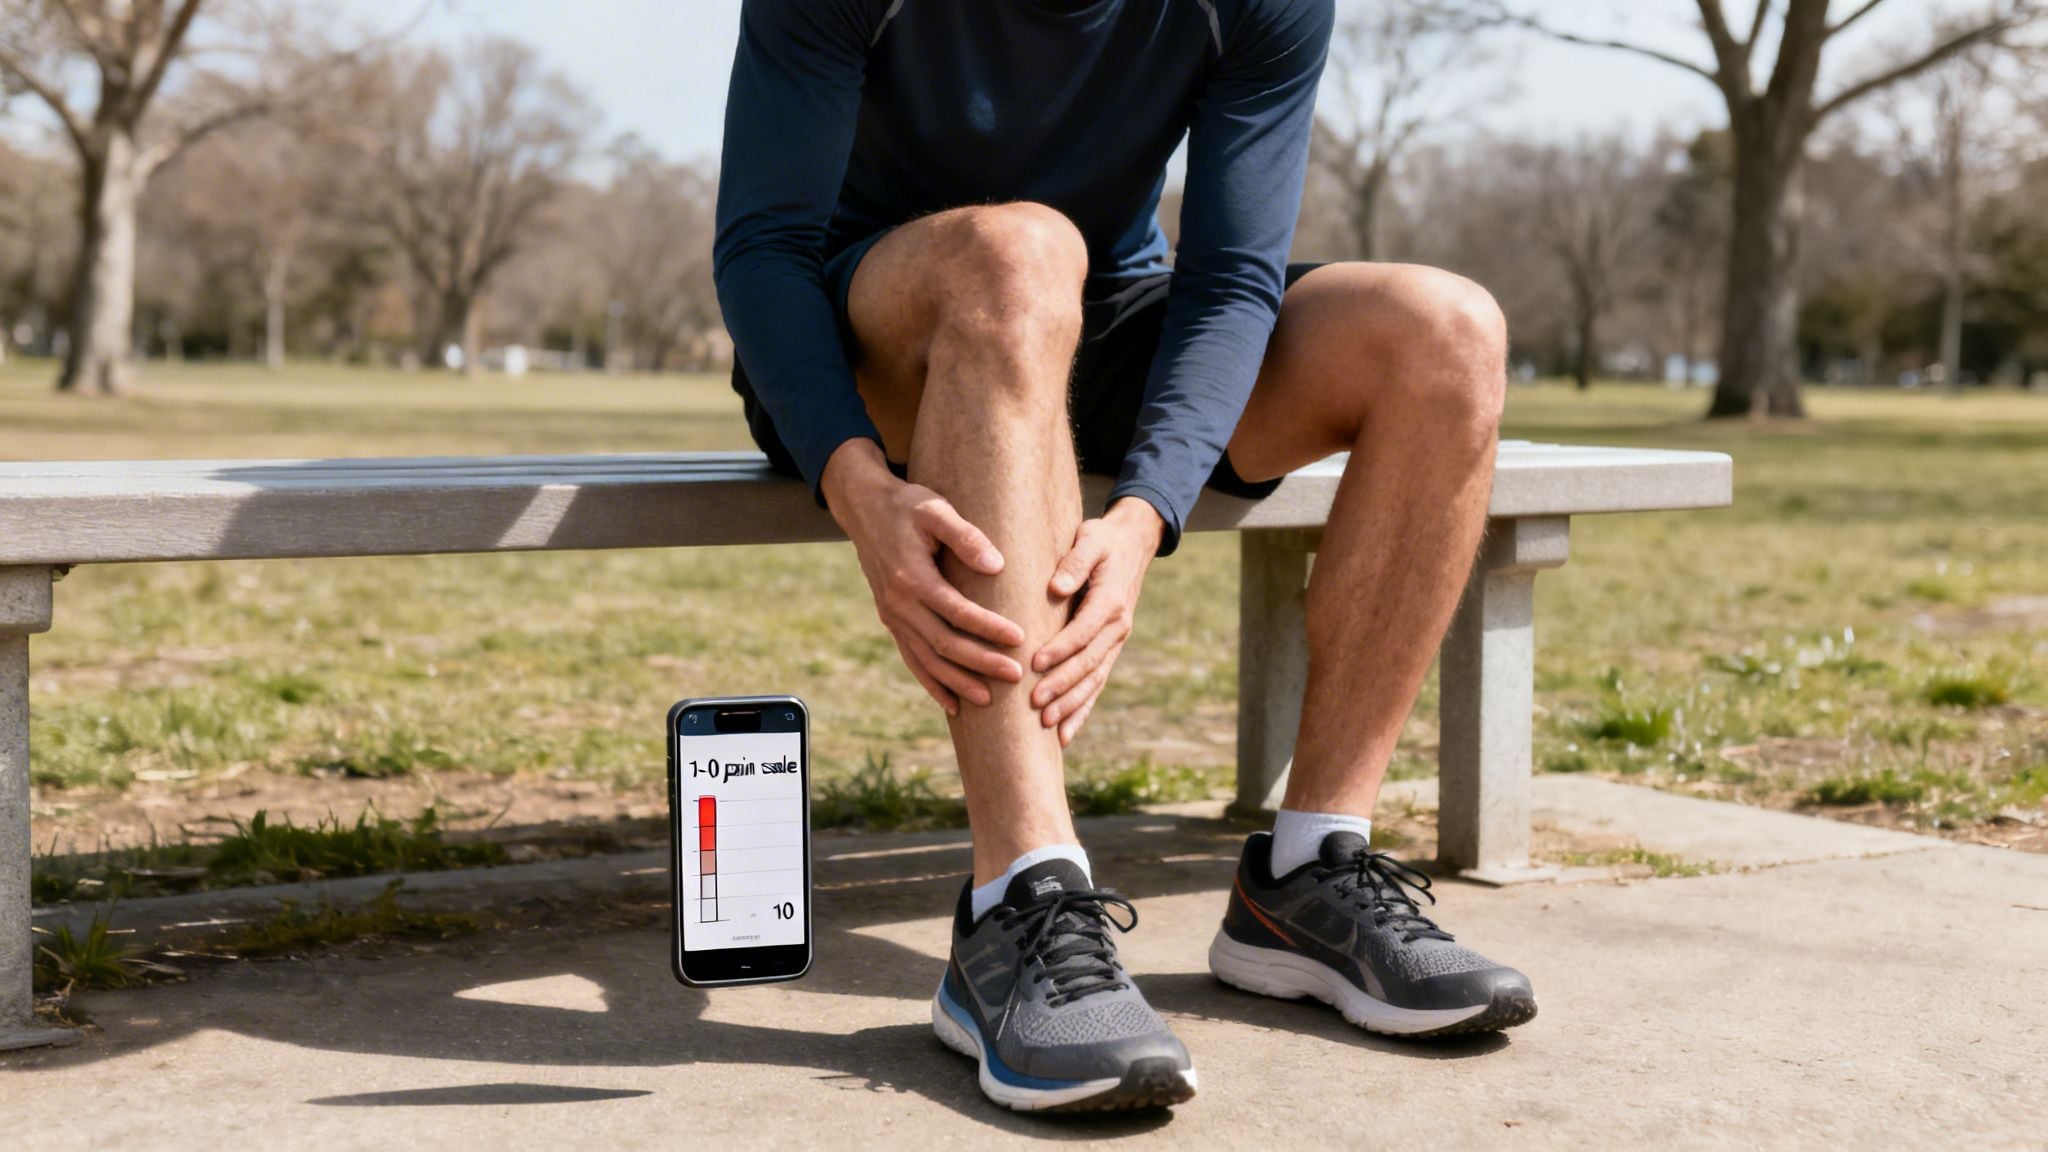
So how do you know how much is too much? To manage your activity without causing more harm, physical therapists often use a simple framework called the "Soreness Rules." This guide is incredibly practical because it helps you make decisions in real time based on your pain level, empowering you to stay active without setting yourself back. It's all about finding that sweet spot between activity and recovery.
Here's how you might use it in a real-world scenario:
- You're a runner training for a 10k. You head out for a planned five-mile run. Around mile two, you start to feel that tell-tale shin pain, maybe a 3 out of 10 on the pain scale.
- Instead of pushing through or stopping completely, you apply the rules. A pain level of 3/10 is generally acceptable, so you can continue your run while monitoring it closely.
- But if that pain creeps up to a 6/10, that's your clear signal to stop running and walk home. The next day, you’d plan a shorter, less intense run or switch to a cross-training activity like swimming or cycling.
This table provides a simple, actionable framework for athletes to manage their activity levels based on pain experienced during and after exercise, helping them avoid further injury.
The "Soreness Rules" for Safe Activity Modification
| Pain Level (0-10 Scale) | Action During Activity | Guideline for Next Day's Activity |
|---|---|---|
| 0-3 | Acceptable. Continue with your planned activity. | Maintain or slightly increase activity, as long as post-activity soreness is minimal. |
| 4-5 | Modify. Decrease intensity or duration by 25-50%. | Stay at the modified level or decrease if pain was worse the next morning. |
| 6-10 | Stop. End the activity immediately and switch to rest or pain-free cross-training. | Take a rest day. The next session should be significantly reduced and pain-free. |
Using this framework transforms pain from a frustrating roadblock into useful feedback, giving you a clear path forward.
Key Takeaway: The goal of immediate shin splint management is not to stop all activity, but to modify it intelligently. Using a pain scale to guide your workouts reduces stress on the tibia while maintaining fitness—a crucial first step in your recovery journey.
A Realistic Healing Timeline
While these immediate steps are vital, it's just as important to set realistic expectations for recovery. Shin splints are a bone-stress injury, and bones need time to heal properly. There's no single magic cure, but a combination of relative rest and a gradual reloading program is the foundation of every successful recovery plan we build.
According to the latest rehabilitation guidelines, the healing timeline for low-risk bone stress injuries like shin splints is typically 4 to 12 weeks. Many of the athletes we see are back to their full activities around the 7 to 8-week mark, but this depends on listening to their bodies and following their program.
For immediate symptom relief, managing inflammation is a big help. Applying ice to the tender area for 15-20 minutes after activity can significantly reduce pain and swelling. To get the most out of it, check out our guide on the differences between icing and heating for injuries.
The Role of a Physical Therapist in Your Recovery
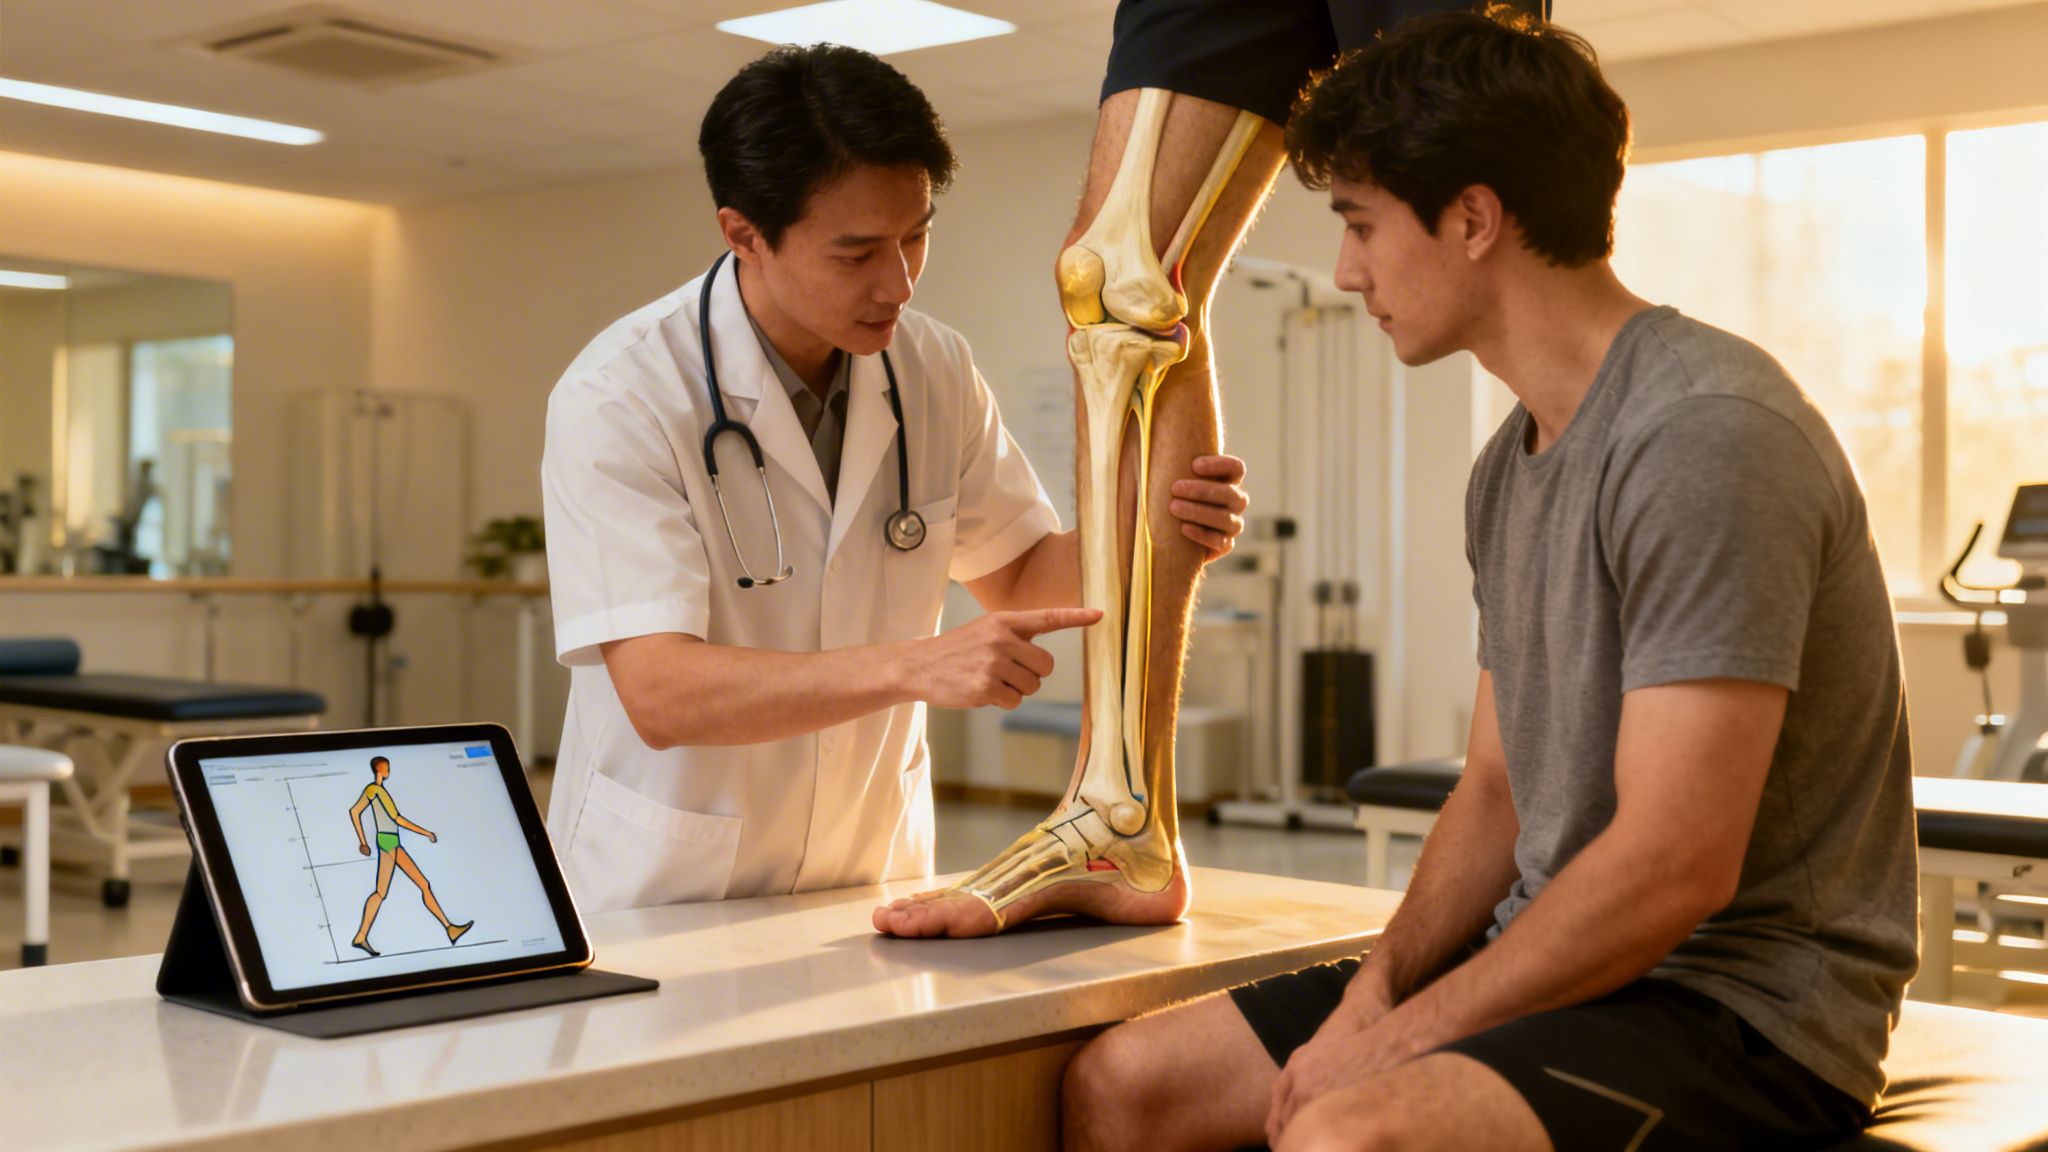
When you’re sidelined by persistent shin pain, a quick internet search can be a frustrating rabbit hole, often leaving you with more questions than answers. This is where a licensed physical therapist becomes your single most valuable resource. We move past the generic advice to give you a clear diagnosis and a personalized roadmap to recovery.
A therapist's first job is to figure out exactly what’s causing your pain. While shin splints, or medial tibial stress syndrome (MTSS), are incredibly common, that nagging ache could also be a red flag for a more serious tibial stress fracture. The difference is critical. MTSS involves inflammation where muscle and tissue attach to the bone, whereas a stress fracture is an actual crack that demands a completely different approach to get better.
Your Comprehensive Evaluation at Highbar
At Highbar Physical Therapy, our evaluation for shin pain goes way beyond just poking the sore spot. We are dedicated to digging down to the root cause of the injury so we can help you get back to your life without pain. As the leading teaching practice in New England, our therapists practice at the top of their license, using a detailed, evidence-based process fueled by a passion for getting people better.
This deep-dive evaluation involves a few key components:
- A Detailed History: We’ll talk through your training habits, any recent changes in your activity, your footwear, and even the surfaces you run on to hunt for potential triggers.
- A Hands-On Assessment: Your therapist will carefully feel along your lower leg to pinpoint the exact source of pain and check the health of the surrounding tissue.
- Strength and Mobility Testing: We systematically test the strength and flexibility in your hips, knees, and ankles to uncover any weak links or imbalances that are contributing to the problem.
This thorough process allows us to build a truly personalized shin splints physical therapy treatment plan. It’s not about handing you a generic sheet of exercises; it’s about creating a specific strategy that addresses your unique body, mechanics, and goals.
A physical therapist does more than just treat the symptom; they diagnose the underlying cause. Distinguishing between general shin splints (MTSS) and a potential stress fracture is a critical first step that determines the entire course of your recovery.
The Power of a Gait Analysis
One of the most powerful tools in our diagnostic toolbox is a video gait analysis. So many cases of shin splints are directly tied to small, repetitive issues in a person’s running form. If you don't fix those patterns, the pain is almost guaranteed to come back.
During a gait analysis, we'll have you run on a treadmill while we record you. Then, we use slow-motion playback to break down your movement, frame by frame.
We look for common culprits that contribute to shin splints, such as:
- Overstriding: Landing with your foot way out in front of your body, which acts like a brake and sends a jarring impact right up your lower leg.
- Excessive Overpronation: Your foot rolls too far inward after it hits the ground, creating a twisting stress on the shin.
- Poor Hip Stability: Weakness in your glute muscles can let your knee collapse inward, which transfers abnormal forces all the way down to your tibia.
By spotting these specific issues, we can give you targeted cues and exercises to clean up your running mechanics. This not only helps your current injury heal but also makes you a more efficient runner and dramatically reduces your risk of future problems. Our passion is using this deep knowledge to empower you with the tools for long-term health and performance, making sure you can keep doing what you love.
Your Evidence-Based Shin Splint Rehabilitation Program
Once we’ve figured out why your shins are hurting, we can get to work building you back stronger. A successful shin splints physical therapy treatment program isn’t just a random list of exercises; it’s a structured, progressive journey.
At Highbar, our entire approach is designed to guide you through this process with a clear, evidence-based plan. We’ll start by calming down the angry tissues, then focus on getting your full mobility back, and finally, build the kind of robust strength that prevents this injury from ever coming back. It’s a team effort, and we adjust every step based on how your body is responding.
Phase 1: Calming Things Down and Restoring Mobility
The first order of business is to get the pain under control and gently restore normal movement. This isn't about sitting on the couch for weeks. It’s about active recovery.
Your physical therapist will use hands-on manual therapy to release tension in the muscles that are pulling on the shin, like the tibialis posterior and soleus. These are often the main culprits.
Here’s what that often looks like:
- Soft Tissue Mobilization: Think of this as a targeted massage to decrease muscle tightness and get better blood flow to the area, which is crucial for healing.
- Foam Rolling Guidance: We’ll show you exactly how to use a foam roller on your calf muscles (both the gastrocnemius and soleus) to relieve the pulling forces on your shinbone.
- Targeted Stretching: We go way beyond a generic calf stretch. We'll pinpoint specific limitations to make sure you get back your full ankle range of motion—especially dorsiflexion, which is your ability to pull your toes up toward your shin.
For example, we might have you do a classic straight-knee "Gastrocnemius Stretch" against a wall, immediately followed by a bent-knee "Soleus Stretch." It's this attention to detail that makes a professional program work.
Phase 2: Building a Strong Foundation
With the pain dialed down, the real work begins. The goal here is to strengthen all the muscles that support your foot, ankle, and shin. Weakness in these areas is one of the biggest reasons shin splints happen in the first place, so building them up is your best defense.
A key part of any good rehab program involves targeted strengthening of the lower leg. This often includes tools like anatomy-focused ankle resistance bands workouts to isolate specific muscle groups.
We always start with simple, controlled exercises and then build from there.
- Isometric Holds: These are exercises where you contract a muscle without any joint movement. Your therapist might have you push your foot against their hand in different directions, activating the shin muscles without putting stress on them.
- Intrinsic Foot Strengthening: We often call this "foot core" training. It targets the tiny muscles inside your foot with exercises like "towel curls" or the "short foot" exercise, which helps rebuild your arch.
- Calf Raises: This one is fundamental. We’ll start you with two-legged raises and gradually progress you to single-leg raises to build serious calf strength and endurance. This is non-negotiable for absorbing impact when you run.
Your Highbar therapist will keep a close eye on your form, adjusting the difficulty to keep you challenged but always safe. We believe in teaching you the why behind the exercises, so you feel empowered and in control of your own recovery.
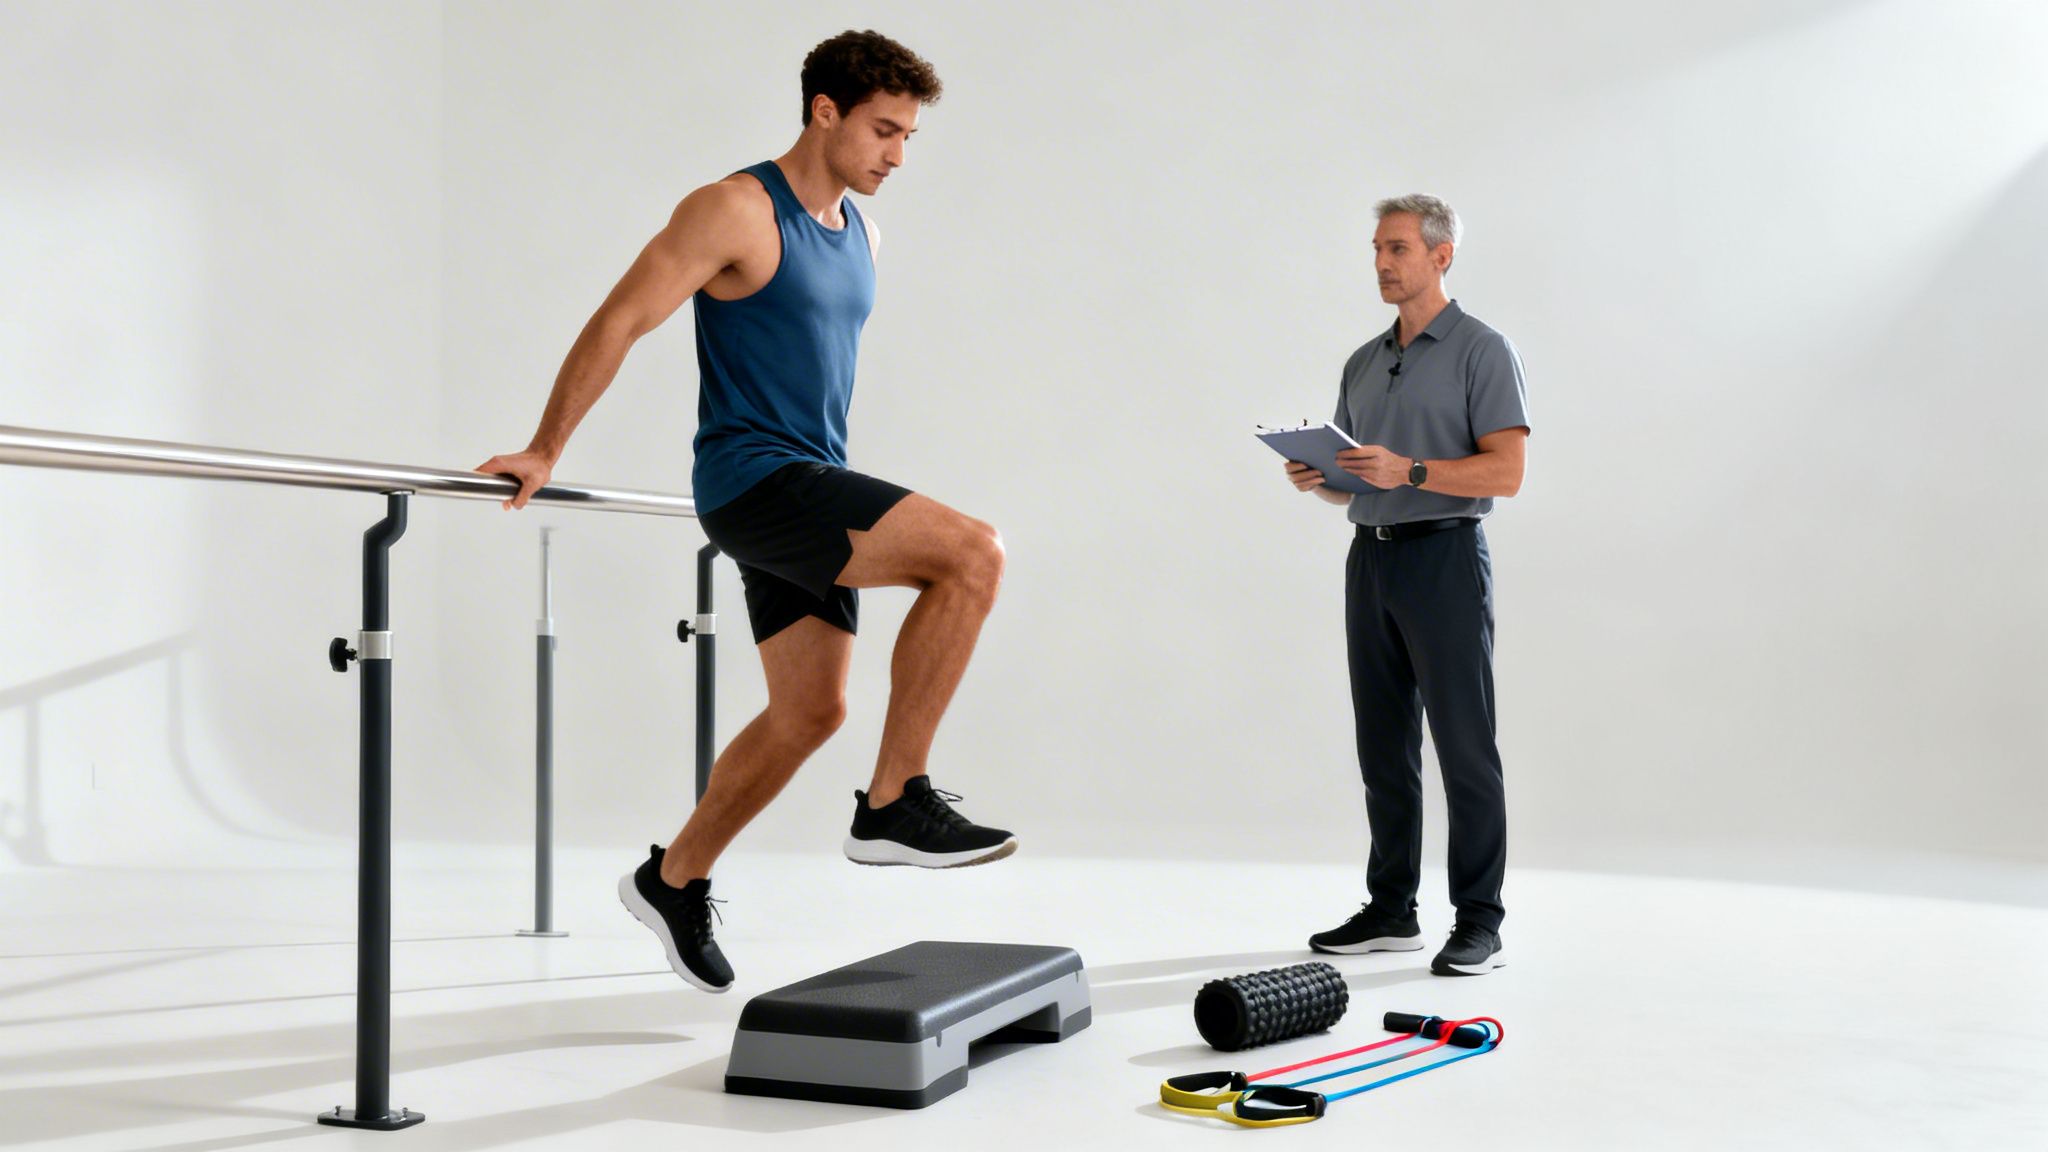
Phase 3: Getting Back to Real-World Movement
This is where we bridge the gap between the clinic and your sport. Once you’ve built a solid base of strength, we start adding more dynamic, sport-specific movements. The goal is to prepare your body for the demands of running, jumping, and cutting so you can return to activity with confidence.
A great case study of a 28-year-old with shin splints showed just how effective this is. A combination of manual therapy, stretching, and strengthening dropped their pain at rest from a 4/10 to a 2/10 in just one week. By the second week, their activity-related pain was a manageable 2/10. You can read more about this shin splint recovery case on PMC. This shows how fast a structured program can work.
Key exercises in this phase often include:
- Eccentric Heel Drops: This involves slowly lowering your heel off a step. This "negative" muscle work is incredibly powerful for strengthening tendons and improving their ability to handle load.
- Plyometrics: We start small with simple hops and jumps, like pogo jumps, to retrain your lower legs to absorb and produce force like springs.
- Gait Retraining: We’ll circle back to your running form, offering simple cues like "run softer" or "increase your step rate." These small tweaks can dramatically reduce the impact forces that caused the shin splints in the first place.
An effective rehabilitation program is always progressive. You’ll move from simple, non-weight-bearing exercises to dynamic, high-impact movements that directly prepare you for the demands of your sport, ensuring your body is truly ready.
By following this evidence-based progression, you aren't just getting rid of pain—you're building a more resilient body. We also integrate a variety of stretches to keep you limber. You can learn more by checking out our guide on creating a proper dynamic stretching routine. This thoughtful, comprehensive approach is how we get you back to moving freely and living fully.
Advanced Treatments for Persistent Shin Splints
Most of the time, a solid physical therapy plan focused on managing your activity levels, building strength, and improving mobility is exactly what you need to beat shin splints. But what happens when the pain just digs in its heels and refuses to leave? For those stubborn cases of medial tibial stress syndrome (MTSS) that don’t get better with the initial game plan, we have a few more tools in our belt to help kickstart the healing process.
At Highbar Physical Therapy, we are committed to evidence-based practice. That just means we only use treatments backed by solid research. When it comes to persistent shin splints, that often involves advanced manual therapies and specialized tools designed to wake up the body’s repair systems when they’ve stalled out. This is a critical part of a comprehensive shin splints physical therapy treatment plan for chronic, frustrating cases.
Unlocking Healing with Advanced Manual Therapy
When shin splints become a chronic problem, the muscles and connective tissues around the shinbone can develop adhesions and trigger points. Think of these as tiny, stubborn "knots" that make the tissue less pliable, restrict movement, and keep the pain cycle going. Advanced manual therapy goes beyond general massage to specifically target and break up these problem areas.
Our physical therapists have a lot of hands-on techniques they might use:
- Instrument-Assisted Soft Tissue Mobilization (IASTM): This technique uses specially designed stainless steel tools to find and break down scar tissue and tight spots in the fascia. The tools allow us to get deeper and be more precise than we often can with just our hands.
- Myofascial Release: Here, we apply sustained, gentle pressure to the connective tissue that wraps around your muscles. For shin splints, we’re often focused on releasing tension in the deep calf muscles that attach right onto the tibia.
- Trigger Point Therapy: This involves putting direct, firm pressure on those specific, irritable spots within a muscle to get them to release. It can bring immediate relief from the referred pain that these knots often cause. You can learn more about one powerful way to do this by reading about the benefits of Trigger Point Dry Needling in our detailed article.
These techniques aren't just about feeling better for a little while. By breaking down those adhesions and getting the tissues moving normally again, we improve blood flow and create a much better environment for your body to finally heal itself.
Extracorporeal Shockwave Therapy (ESWT) for Chronic Shin Splints
For the most persistent cases, one of the most promising advanced treatments we use is Extracorporeal Shockwave Therapy (ESWT). It’s a non-invasive technology that sends acoustic waves—basically, sound waves with high energy—to the exact spots that are causing you pain.
The best way to think about it is like jump-starting a stalled car engine. The shockwaves create a tiny, controlled trauma in the targeted area, which provokes a powerful healing response from your body. This process ramps up blood flow and metabolism, which can supercharge tissue repair and calm down pain in tissues that have been "stuck" in a chronic state for months.
Key Insight: ESWT is particularly effective for chronic tendinopathies and bone-stress injuries like shin splints that haven't responded to other treatments. It essentially re-awakens the body's natural healing process.
The research on ESWT is really compelling. We know that a well-rounded physical therapy approach that includes rest, stretching, strengthening, and other modalities works, with non-operative treatments successfully resolving up to 78% of shin splint cases. Within that framework, ESWT really stands out. Studies show that more athletes were able to get back to their sport after receiving shockwave therapy compared to those who didn't. This makes it a powerful option when the usual methods just aren't enough.
At Highbar, our passion for physical therapy means we are always digging into the latest research to find the best path forward for our patients. For the right person, advanced treatments like specialized manual therapy and ESWT can be the missing piece of the puzzle—the breakthrough you need to finally move freely and live without shin pain.
Returning to Sport and Preventing Re-Injury

Getting back to your sport after an injury is a huge accomplishment, but the real victory is staying there, pain-free. The final phase of your shin splints physical therapy treatment is arguably the most important one. It’s all about a smart, criteria-based return to activity—not just flipping a switch back to 100%.
This is where you learn to take ownership of your health, which is the core of our mission at Highbar Physical Therapy. We want you to walk away with the tools and knowledge to manage your body, troubleshoot setbacks, and live an active life without the constant fear of re-injury.
Your Return-to-Sport Checklist
So, how do you know when you’re truly ready? We don’t guess. Your physical therapist will guide you through a series of practical tests to make sure your body can handle the demands of your sport. Think of it as a final exam before you graduate back to full intensity.
A few key milestones you’ll need to pass include:
- The Pain-Free Test: You have to be able to go about your daily life for at least five consecutive days without a hint of shin pain.
- The Hopping Test: A classic benchmark is the ability to hop on your affected leg 10-15 times in a row without pain. This simple test is a great indicator that your bone and surrounding tissues are ready for impact again.
- Strength Benchmarks: You’ll need to demonstrate good form and symmetrical strength on both legs while performing key exercises like single-leg calf raises and bridges.
Only after you’ve checked all these boxes will we begin a structured, gradual return to running.
A Gradual Return-to-Run Program
Jumping straight back into your old mileage is a recipe for disaster. The key is a gradual progression that lets your shin and lower leg tissues adapt to the stress of running again. This slow and steady approach dramatically reduces your risk of a flare-up.
Below is a sample of what a return-to-run program might look like. Remember, this is a template; your physical therapist will customize a plan specifically for you based on your progress, sport, and goals.
Return-to-Run Program Example (Post-Rehab)
| Week | Run/Walk Interval | Total Time | Frequency |
|---|---|---|---|
| Week 1 | Run 1 min / Walk 4 min (Repeat 5x) | 25 min | 3x per week |
| Week 2 | Run 2 min / Walk 3 min (Repeat 5x) | 25 min | 3x per week |
| Week 3 | Run 4 min / Walk 2 min (Repeat 5x) | 30 min | 3x per week |
| Week 4 | Run 6 min / Walk 2 min (Repeat 4x) | 32 min | 3x per week |
Each week builds on the last, giving your body the time it needs to build resilience. If any step causes pain beyond a mild, acceptable level (typically a 2/10), we simply take a step back to the previous pain-free level before trying to advance again.
Long-Term Prevention Strategies
Once you’re back in action, the focus shifts to making sure shin splints don’t become a recurring problem. This means continuing to manage the root causes we identified during your evaluation.
- Proper Footwear: Your shoes are your first line of defense. We’ll help you find a shoe that matches your foot type and running mechanics. Make sure to replace your running shoes every 300-500 miles—the cushioning breaks down long before the shoe looks worn out.
- Addressing Biomechanics: We will have armed you with the right exercises and cues to keep working on any weaknesses or form issues. Whether it’s improving hip stability or increasing your running cadence to reduce overstriding, these changes are your secret weapon for long-term prevention.
- Orthotics and Support: For some people, especially those with significant overpronation, over-the-counter or custom orthotics can provide the extra support needed to keep the foot and lower leg in a better position, which offloads stress from the shin.
As part of a holistic approach to recovery and prevention, some athletes find it helpful to review recommended supplements for runners to ensure their nutritional strategy supports their training demands.
Key Takeaway: Prevention isn't passive. It's an active process of wearing the right gear, maintaining the strength you built in physical therapy, and being mindful of your form on every single run.
Troubleshooting Common Setbacks
Even with the best plan, you might hit a snag. A little soreness is normal, but it’s important to know how to respond when a familiar ache starts to creep back in.
First, don't panic. A minor flare-up is usually just your body’s way of saying you pushed the intensity or mileage a bit too fast. The solution is simple: back off for a day or two, stick to cross-training, and then resume your program from the last stage you completed without pain. Learning to listen to your body and manage these small setbacks is what gives you the confidence to stay in the game for good.
Common Questions About Shin Splint Treatment
When you're dealing with shin splints, a lot of questions come up. We get it. At Highbar Physical Therapy, we believe a big part of getting you better is making sure you understand what's happening and why.
Here are the straightforward answers to the questions we hear most often from patients just like you.
How Long Does Physical Therapy For Shin Splints Take?
Everyone’s recovery journey is a bit different, but most of our patients start feeling significant relief and get back to their activities within 4 to 12 weeks.
This timeline depends on a few things: how bad the pain was when you started, how consistent you are with your exercises at home, and just how your own body heals. Our goal isn't just to stop the pain now; it's to make you more resilient so this problem doesn't come roaring back later.
Do I Need A Doctor's Referral For Physical Therapy?
Nope, you don't. Both Rhode Island and Massachusetts are Direct Access states. This means you can book an appointment with a licensed physical therapist at Highbar right now, no doctor's referral needed.
This is a huge win for your recovery. It saves you the time and cost of an extra appointment and—most importantly—lets you start getting relief immediately. You can book an appointment online with us right now and get the process started.
Can Telehealth Physical Therapy Help My Shin Splints?
Absolutely. Telehealth is a fantastic and incredibly convenient way to get top-tier care for shin splints, especially if you have a packed schedule or find it tough to travel.
Through a secure video call, your physical therapist can do everything they would in the clinic:
- Perform a detailed virtual evaluation to understand your movements and symptoms.
- Guide you through a personalized exercise program, demonstrating each movement.
- Analyze your running mechanics by having you send a short video.
- Adjust and progress your plan based on your real-time feedback.
It's an amazing option for getting expert guidance from home, ensuring nothing gets in the way of you living a fuller, more active life.
Key Takeaway: Direct Access and Telehealth have completely changed the game. You now have the power to get expert help immediately and conveniently, which is often the secret to a faster, more complete recovery.
What Red Flags Should I Watch For With Shin Pain?
While most shin pain is due to medial tibial stress syndrome (MTSS), it’s critical to know when the symptoms might be pointing to something more serious. Your safety is always our first priority.
Keep an eye out for these red flags. If you experience any of them, it's time to seek immediate medical attention:
- Pinpoint Pain: The pain isn’t spread out along the shin but is focused on one tiny spot on the bone that is intensely tender if you press on it.
- Night Pain: The pain is bad enough to wake you up from a sound sleep.
- Visible Signs: You can see significant swelling, redness, or feel unusual heat coming from the area.
These symptoms could signal a stress fracture, which needs a different and more cautious approach to management. Don't ever hesitate to get these kinds of symptoms checked out right away.
At Highbar Physical Therapy, our mission is to help you move freely and live fully. If you're tired of being sidelined by shin pain, let our team of expert physical therapists create a personalized treatment plan to get you back to the activities you love. Book your appointment online today.