Many individuals do not notice thoracic kyphosis all at once.
They notice it in pieces. A stiff upper back after a workday. Shoulders that keep drifting forward in the car. A neck that feels overworked by midafternoon. A gym lift that suddenly feels awkward overhead. A family member saying, “You’re slouching again,” even when you thought you were sitting up straight.
Reclaiming Your Posture in a Forward-Flexed World
Modern life keeps pushing the body into flexion. Laptops pull your eyes down. Phones bring your arms forward. Commutes lock the spine into one position. Over time, that rounded posture starts to feel normal.

A foam roller can help, but not because it magically “fixes posture.” It works when you use it to restore movement in the thoracic spine, then train your body to hold that new position. Mobility comes first, but it only matters when it leads to better control through the day. That is the same principle behind good rehab and the same reason mobility matters for physical health.
What changes when posture drifts forward
A forward-flexed upper back can affect more than appearance. It can make reaching overhead harder, change shoulder mechanics, and leave the neck and mid-back doing extra work.
For some people, the issue is mainly postural kyphosis. That means the curve is influenced by stiffness, muscle imbalance, and habit. For others, the curve reflects structural change and needs a different medical approach.
Why acting early matters
This is not only a concern for desk workers. In older adults, kyphosis can progress over time, and the progression is more pronounced in women. Females aged 55 to 80 experienced approximately 5 degrees of kyphosis progression every decade in findings discussed in this review of age-related hyperkyphosis treatment and progression: older adult kyphosis progression and intervention timing.
That matters because posture is not just cosmetic. As the curve increases, daily tasks can feel harder, balance can feel less steady, and people often move with less confidence.
A foam roller is a tool, not a treatment plan by itself. Good results come from matching the tool to the right person, the right technique, and the right follow-up exercises.
If your upper back feels stuck, the answer is not to force a big backward bend and hope for the best. The answer is to improve motion where you are stiff, support that motion with strength, and know when self-treatment is not the right starting point.
Why Foam Rolling Works for Thoracic Kyphosis
The thoracic spine is built for both stability and movement. When it gets too stiff, the body starts borrowing motion from places that should not have to compensate, usually the neck, shoulders, or lower back.
That is why people with a rounded upper back often say things like, “My neck is always tight,” or “My shoulders never feel right overhead.” The upper back is not moving well, so nearby joints pick up the slack.
What the roller does
With foam roller kyphosis work, the goal is not aggressive cracking or forcing the spine flat. The goal is to create a more useful amount of thoracic extension and reduce soft tissue restriction around the chest, upper back, and lats.
When done well, foam rolling gives you two things:
- A mobility window: the thoracic segments move more freely
- A sensory reset: you feel where upright posture is
Research supports that approach. Thoracic foam roller exercise led to a significant decrease in thoracic kyphotic angle and a significant increase in trunk active range of motion, as reported in this study on thoracic foam rolling and posture-related outcomes: thoracic foam roller exercise and thoracic kyphotic angle.
If you already use a roller for recovery after workouts, this is a different application. The target is the thoracic spine and surrounding tissues, not just general soreness. A broader overview of foam roller benefits helps, but posture work needs more precision.
Postural vs structural kyphosis
This distinction matters.
Postural kyphosis often improves when the person changes position, improves thoracic mobility, and strengthens the muscles that support upright alignment.
Structural kyphosis does not respond the same way. The curve may be related to vertebral shape, bone health, spinal deformity, or another medical issue. In those cases, a roller can be unhelpful or even aggravating if used without guidance.
A few signs that suggest a simple home routine may not be enough:
- The curve feels rigid: you cannot change it much even when you try
- Pain is sharp or spreading: not just local stiffness
- Neurologic symptoms show up: numbness, tingling, or weakness
- The posture change is recent and unexplained: especially after injury or with bone health concerns
Why some people feel better right away
A lot of people get immediate relief because the roller improves extension where they have been living in flexion all day. That can make breathing feel easier, shoulder motion feel smoother, and sitting upright feel less effortful.
But the fast improvement can fool people. They think the roller alone solved the problem. Usually it did not. It opened the door. The next job is teaching the body to keep that change.
If rolling gives relief for an hour and you collapse back into the same posture by lunch, the missing piece is usually strength or daily positioning, not more rolling.
That is where a clinician-backed routine makes the difference.
The Clinician-Backed Foam Roller Routine
The best foam roller kyphosis routine is not just rolling. It follows a sequence. First you free up the stiff areas. Then you activate the muscles that support the new position. Then you build that posture into movement and daily life.
That sequence is backed by a corrective exercise protocol using Lengthen, Activate, Integrate. In that protocol, the Lengthen phase included self-myofascial release on the thoracic spine for 2 to 3 minutes, with tender points held for 30 to 60 seconds, followed by activation and integration work to support the mobility gains: Lengthen Activate Integrate corrective exercise protocol.
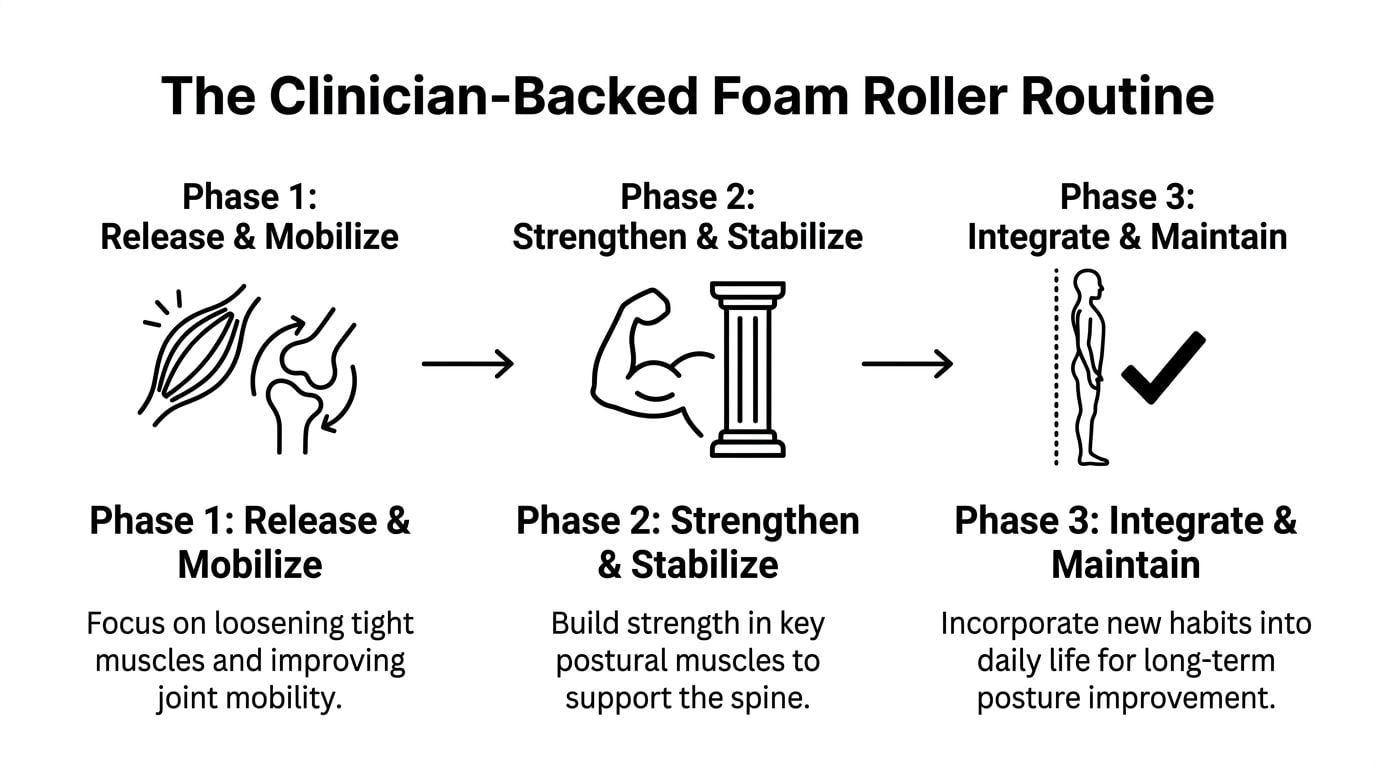
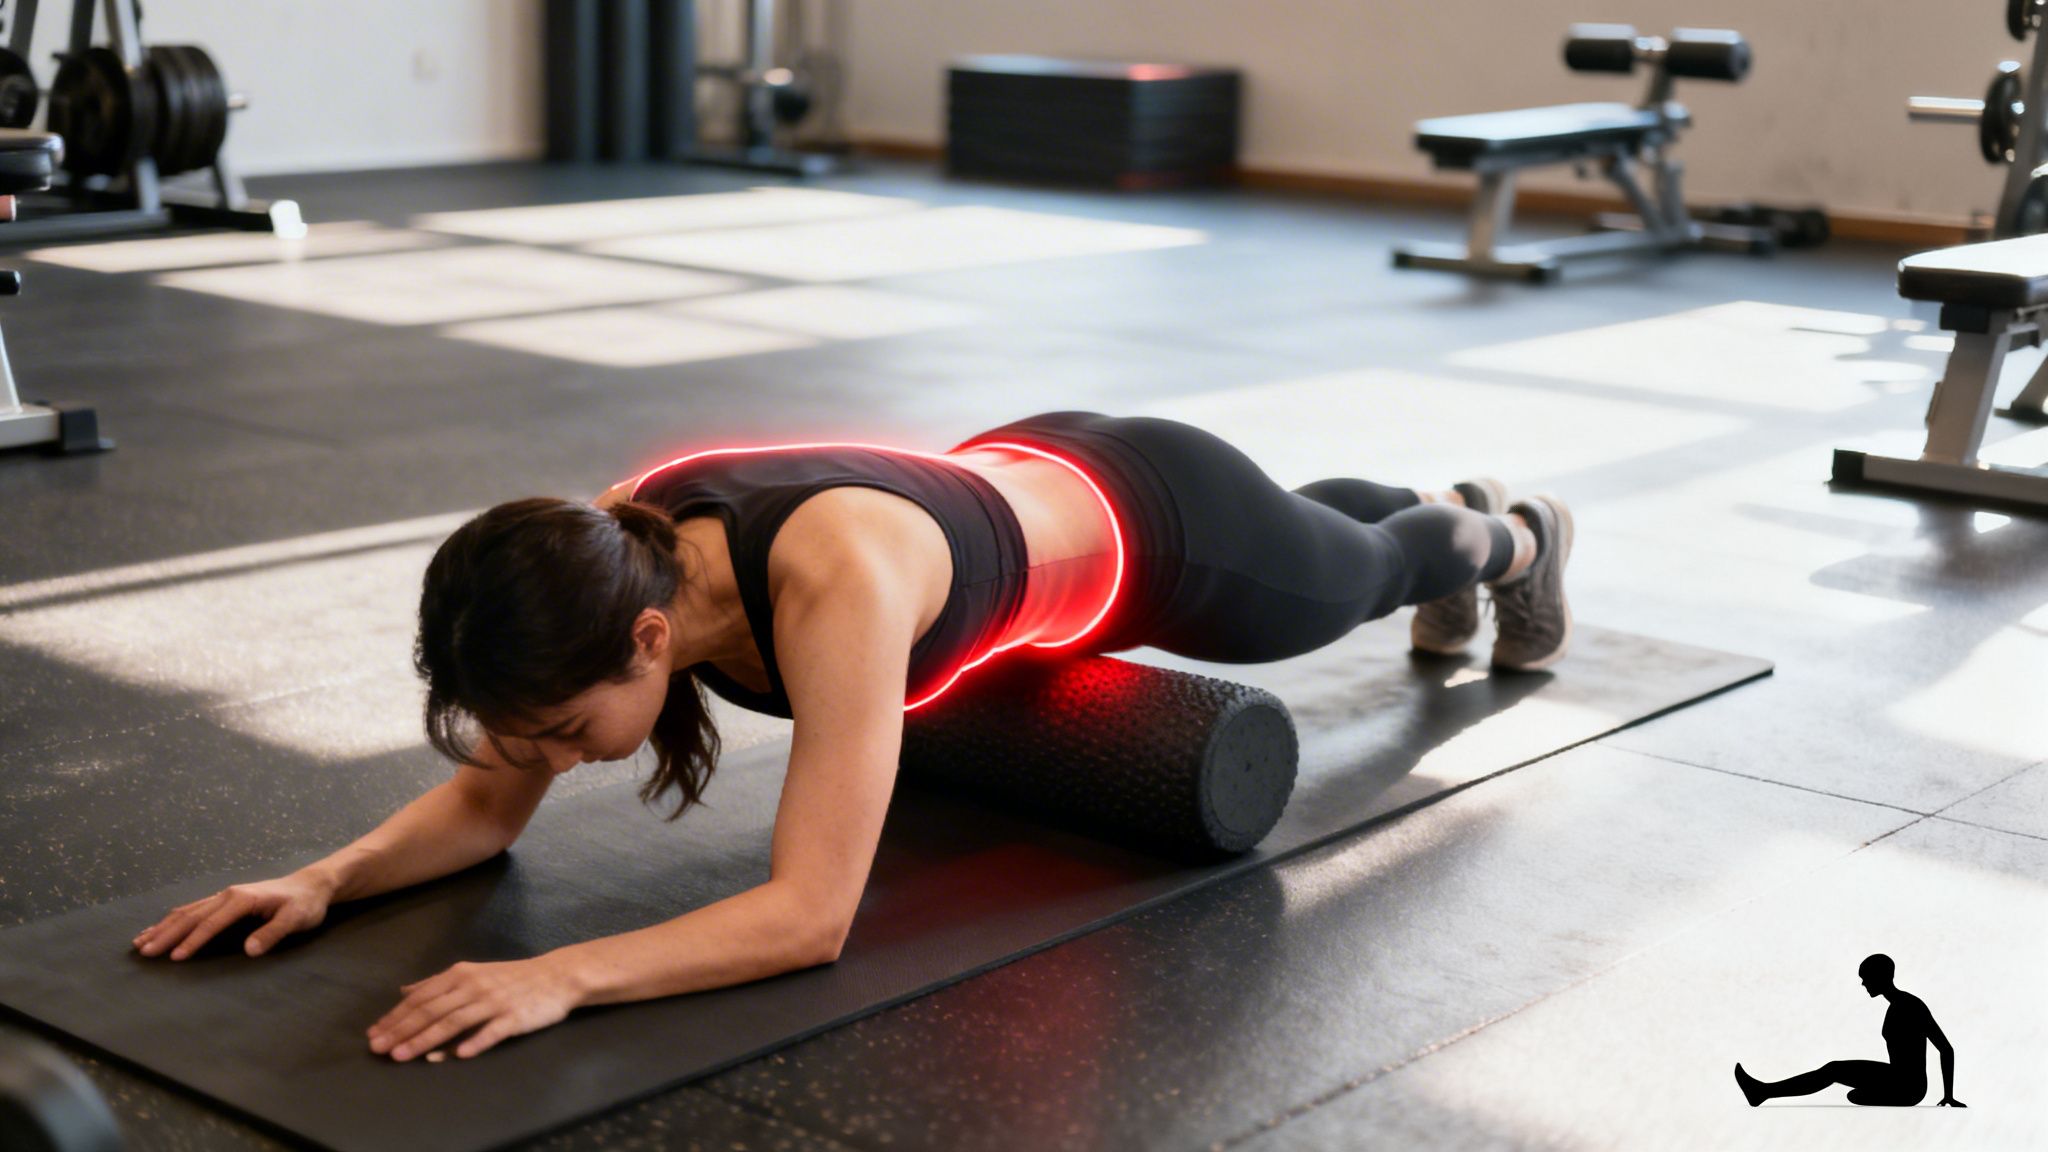
Release and mobilize
Start here if your upper back feels blocked, your chest feels tight, or you cannot comfortably stack your rib cage over your pelvis.
Thoracic extension on the roller
Set the foam roller perpendicular to your spine at the upper or mid-thoracic region, not at the lower back.
Use this sequence:
- Lie on your back with knees bent and feet flat.
- Support your head with your hands so your neck stays relaxed.
- Keep your ribs from flaring too hard. Think gentle extension, not a big backbend.
- Lean over the roller slowly and breathe out as your upper back relaxes into it.
- Return to neutral and move the roller slightly up or down to work a nearby segment.
A good cue is to let your breastbone soften upward while the back of your rib cage drapes over the roller.
Tender point holds
If you hit a stiff or sensitive spot, pause there instead of rushing past it.
- Hold the position for 30 to 60 seconds
- Breathe slowly
- Let the muscles settle
- Do not force extra extension
This is often more effective than fast rolling back and forth.
Pectoral and lat work
If your shoulders round forward, your thoracic spine is rarely the only restriction. Tight pecs and lats can keep pulling you back into flexion.
Try:
- Pectoral release: gently target the front of the shoulder and chest area with pressure you can tolerate
- Lat release: work the side of the upper back and rib cage carefully, especially if overhead reach feels limited
Strengthen and stabilize
Mobility without support fades quickly. Once you create better thoracic movement, your mid-back and scapular muscles need to hold it.
Prone Y T W raises
These are simple and effective when performed well.
- Y position: arms overhead in a Y, thumbs up
- T position: arms out to the side
- W position: elbows bent, shoulder blades drawing back and down
The target is not range for range’s sake. The target is controlled lifting from the mid-back without shrugging the shoulders toward the ears.
Use slow reps. If you feel this only in the neck, reduce the range and reset your shoulder blade position.
Band isometric holds
Resisted holds are useful if you tend to lose posture quickly.
Try focusing on:
- Rhomboids
- Mid-trapezius
- Lower trapezius
Hold a gentle pull against a band while keeping the chest open and the neck relaxed. In the corrective exercise framework, these muscles were trained with isometric holds after the lengthening phase.
Wall-based scapular control
Stand with your back against a wall and lightly flatten the back of the rib cage without jamming your lower back. Then slide the arms upward as far as you can without shrugging or losing control.
This is a good bridge between isolated strengthening and functional posture.
If an exercise makes your lower back arch more than your upper back moves, you are compensating. Reduce the motion and re-center your ribs.
Integrate and maintain
This is the part many individuals skip, and it is why many home programs stall.
The body has to use the new mobility in real movement. Otherwise, you get temporary relief and no lasting carryover.
Upright breathing resets
Stand tall with your feet grounded. Exhale gently and let the ribs come into a neutral position. Inhale into the sides and back of the rib cage without lifting the chin or arching the low back.
This teaches the trunk to support a better thoracic position.
Desk posture practice
Pick one or two cues, not ten.
Useful options include:
- Bring the screen to eye level
- Let the breastbone stay lifted without flaring the ribs
- Keep the shoulders heavy, not pinned back
- Take brief movement breaks before stiffness builds
Trying to “sit perfectly” all day usually fails. Changing positions more often works better.
Carryover into exercise
If you lift weights or play sports, use the new thoracic position where it matters:
- Rows: avoid neck-driven pulling
- Overhead press: move through the upper back, not only the low back
- Front rack positions: keep chest open without rib flare
- Running posture: keep the trunk stacked instead of folding through the upper body
A sample session flow
Here is a practical way to put it together:
| Phase | Focus | Example |
|---|---|---|
| Release and mobilize | Improve thoracic and chest mobility | Thoracic extension, tender point holds, chest release |
| Strengthen and stabilize | Build support for upright posture | Y-T-W raises, band holds, wall slides |
| Integrate and maintain | Use gains in daily movement | Breathing resets, desk cues, carryover into workouts |
A good session feels organized, not random. The roller opens the door. Strength keeps it open. Integration teaches your body to walk through it.
How to Modify and Progress Your Routine
The right foam roller kyphosis routine depends on who is using it. A stiff office worker, a swimmer with overhead demands, and an older adult with a long history of rounded posture should not all start the same way.
The safest plan is to match the dose to the person in front of you.
If you are stiff, nervous, or easily irritated
Start with less pressure and less extension.
Good modifications include:
- Use a softer roller or add padding: this reduces pressure if the thoracic spine is tender
- Limit the range: small motion is enough at first
- Work against a wall: place the roller between your upper back and the wall for a gentler version
- Keep the head fully supported: this prevents the neck from overworking
- Spend more time breathing than rolling: the body often relaxes better with slower pressure
For people who tense up quickly, I would rather see careful segmental extension than aggressive rolling.
If you are older or have a more pronounced curve
Be more conservative.
A bigger curve often comes with more stiffness, less extension reserve, or other health variables that change how much force is appropriate. In people over 50 with kyphosis, risk screening matters before self-managing thoracic rolling. Generic online advice often leaves that out.
Focus on:
- Small setup changes: a narrower towel roll can be a useful first step before a full foam roller
- Shorter bouts: stop before symptoms ramp up
- Control over amplitude: think “gentle opening” rather than “big stretch”
- Recovery checks: if soreness lingers or pain spreads, the dose was too high
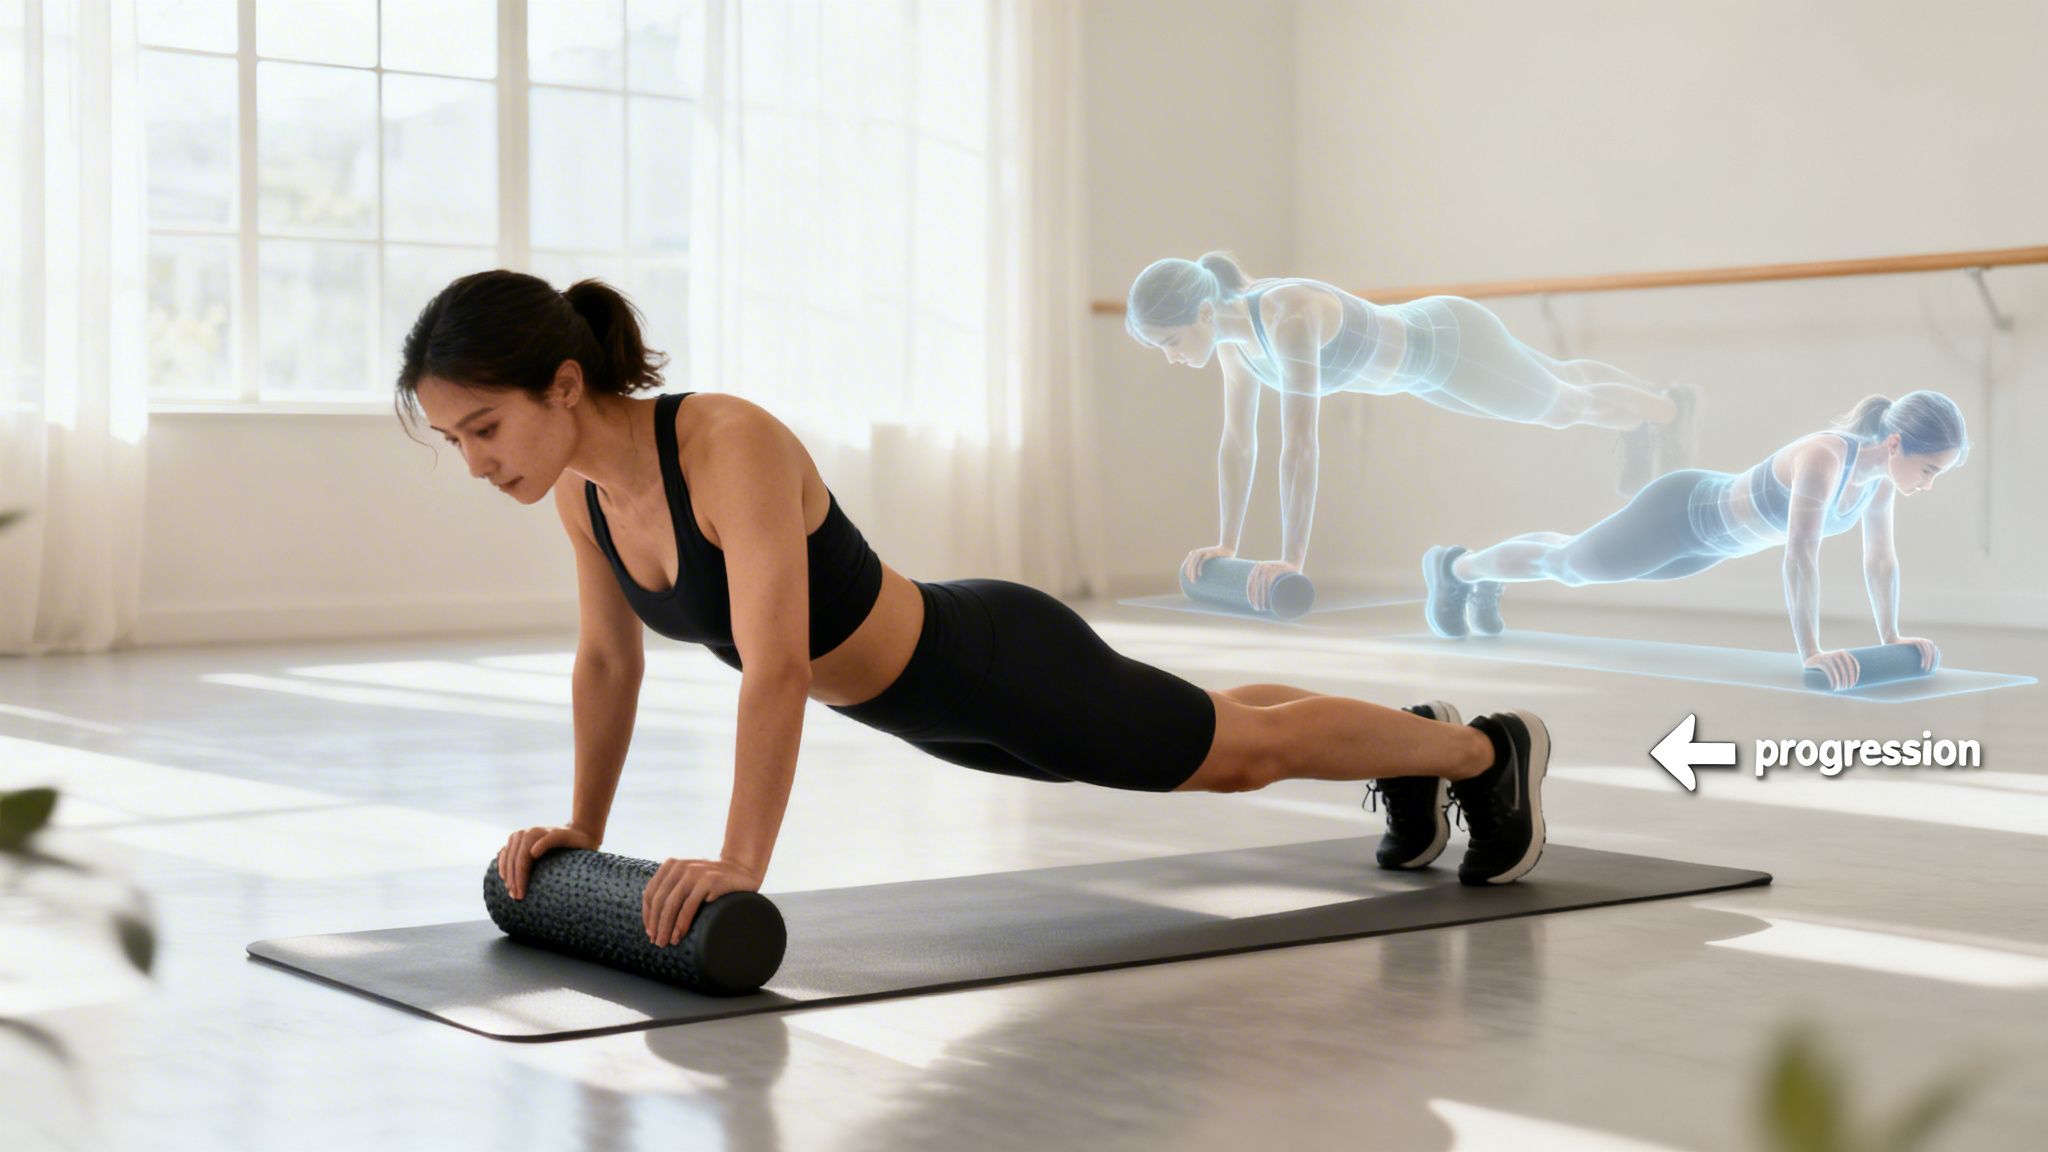
If you are an athlete or already moving well
Progression should come from control, not just a firmer roller.
Try advancing with:
- Arm movements during thoracic extension: overhead reach or alternating arm arcs
- Long-lever stability work: plank variations, bear positions, or wall-supported reaches
- Loaded carry integration: maintain upper back position while walking with load
- Sport-specific carryover: overhead mechanics, front rack mobility, rotational control
The image above shows a progression concept that fits this stage well. Once mobility improves, the next challenge is keeping trunk control while the limbs move.
How to decide whether to progress
Use these simple questions:
| Question | If yes | If no |
|---|---|---|
| Can you roll without holding your breath? | Progress gradually | Stay at current level |
| Can you feel the work in the upper back, not the neck or low back? | Add complexity | Regress and clean up form |
| Do you recover well after sessions? | Increase challenge carefully | Reduce volume or pressure |
Progress when the movement looks cleaner, not when the pressure feels harsher.
A firmer roller is not automatically better. More time is not automatically better either. Better alignment, better breathing, and better carryover are the markers that matter.
Common Foam Rolling Mistakes to Avoid
Most foam roller kyphosis mistakes come from trying to do more instead of doing it better.
People roll too fast. They push into the lower back. They crank the neck backward. Or they spend so long on the roller that the area becomes irritated instead of mobile.
The mistake that gets missed most often
In adolescents with kyphosis, 25% of initial non-responders had poor roller contact at the apex of the kyphosis, and cueing them to “melt into the roller” improved that issue. The same study also reported that rolling for more than 3 minutes caused transient dizziness in 12% of participants: thoracic self-mobilization technique and response issues in kyphosis.
That tells you two important things. Placement matters. More is not always better.
Foam Rolling Do's and Don'ts for Kyphosis
| Common Mistake (Don't) | Better Technique (Do) |
|---|---|
| Roll up and down quickly without pausing | Slow down and spend time on the stiff segment |
| Place the roller on the low back | Keep the focus on the thoracic spine |
| Throw the head backward | Support the head with your hands and keep the neck relaxed |
| Force a huge arch | Use a gentle extension that stays controlled |
| Hold your breath | Exhale as you relax over the roller |
| Keep rolling even when dizzy or irritated | Stop, reset, and shorten the session |
| Only roll the spine and ignore the chest and lats | Address the front and side restrictions that feed rounded posture |
| Roll without follow-up strengthening | Add activation work right after mobility |
A few fixes that work immediately
You feel it in the neck
Bring the elbows slightly closer together, support the head more fully, and reduce the extension range. The neck should not be doing the thoracic spine’s job.
You feel it in the lower back
Move the roller higher. Then gently bring the ribs down so the movement happens in the upper back instead of the lumbar spine.
Nothing seems to change
Check the roller position. Many people miss the apex of the curve. Aim for the stiffest thoracic segment and soften onto it instead of skimming past it.
The best foam rolling often looks boring. Slow movement, accurate placement, normal breathing, and a clear stop point usually beat aggressive reps.
You get sore every time
Cut the duration. Follow mobility with activation. A roller can create too much motion without enough muscular support if you stop after the release work alone.
When to See a Physical Therapist for Your Kyphosis
A foam roller is useful for many people. It is not the right starting point for everyone.
If you have a rounded upper back with mild stiffness and no alarming symptoms, a careful home routine may be reasonable. If you have significant pain, a rigid curve, or medical factors that change spinal loading tolerance, self-treatment can miss the underlying issue.
Situations that deserve professional evaluation
Schedule an evaluation if any of these apply:
- Sharp or radiating pain: especially if it travels into the arm or chest
- Numbness or tingling: possible nerve involvement
- Sudden change in posture: especially after a fall, collision, or unexplained onset
- Known osteoporosis, fracture history, or spinal instability
- You suspect structural kyphosis: including a long-standing rigid curve
- You keep getting worse with home exercises
Risk stratification matters even more for older adults. Generic online advice often omits warnings for people with hyperkyphosis angles greater than 50 degrees, where uncontrolled extension may increase facet joint stress. That same discussion notes a 15% higher injury risk in self-managed thoracic rolling for kyphotic patients over 50 who have not been professionally screened: kyphosis exercise safety considerations and screening concerns.
What a physical therapist can sort out
A good evaluation answers the questions a video cannot:
- Is the problem primarily postural, structural, or both?
- Is the thoracic spine stiff, or is another area driving the pattern?
- Are your shoulders, ribs, or neck compensating?
- Are you a good candidate for foam rolling, or do you need a different first step?
That level of screening is the difference between “general exercise” and targeted care. If you are not sure how to choose the right clinician, this guide on how to choose a physical therapist is a useful place to start.
A home program works best after the right diagnosis. If you are guessing, you may be working hard on the wrong problem.
Frequently Asked Questions About Foam Rolling and Posture
What kind of foam roller is best for thoracic posture work
Many individuals do best with a standard full-length roller that is not overly aggressive. If you are sensitive or older, start softer or add a towel for cushioning. If you already tolerate pressure well, a medium-density roller usually gives enough support without making you brace.
How often should I do a foam roller kyphosis routine
Use the roller often enough to improve movement, but not so much that you stay irritated. Many people tolerate brief, consistent sessions better than occasional long sessions. The better guide is response. You should feel looser and more upright, not inflamed.
How long should I stay on one spot
Short pauses usually work better than endless rolling. If you find a stiff segment, breathe and let it settle. Stop if you feel lightheaded, guarded, or sore in a way that lingers.
Can foam rolling make kyphosis worse
Yes, if the technique is poor or the person is not an appropriate candidate. Problems usually happen when someone forces extension, rolls the wrong area, ignores symptoms, or has a structural issue that needed screening first.
How soon will posture change
Some people feel a difference in mobility right away. Lasting postural change takes consistency. You need the mobility work, the strengthening work, and better daily positioning together.
Should I roll if I have pain
That depends on the kind of pain. Mild muscular discomfort is different from sharp pain, nerve symptoms, or pain tied to injury or bone health concerns. If you are unsure, get assessed before continuing.
If your upper back feels stiff, your posture keeps collapsing, or you are not sure whether foam rolling is appropriate for your spine, Highbar Physical Therapy can help. A licensed physical therapist can assess whether your kyphosis is mainly postural or more complex, show you how to use a foam roller safely, and build a plan that improves mobility, strength, and day-to-day function so you can move more comfortably and live more fully.